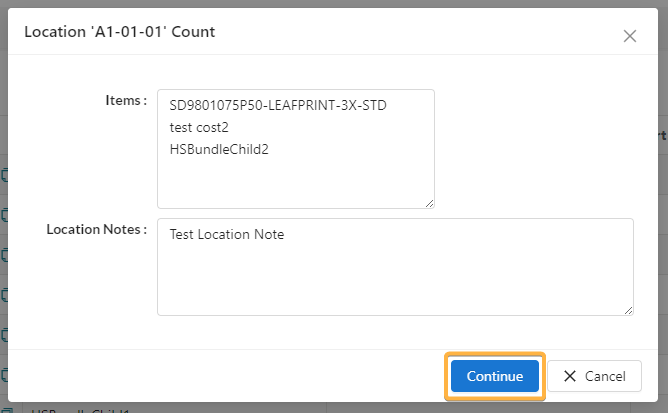
Location Count
First, do a search to find the location you wish to count. Once you have done that, click Location Count. A location count allows you to change the quantity of several items in a location at the same time.

You can manually enter each SKU (hitting Enter after each), copy and paste several SKUs,

or scan them in. This is another place where you can make edits to your location note (this is a required field). Hit Next.

Note: If there is more than one of a particular SKU, you will need to scan each one or copy/paste the SKU the correct number of times - otherwise, if you only enter it once, it will reset the amount to 1.
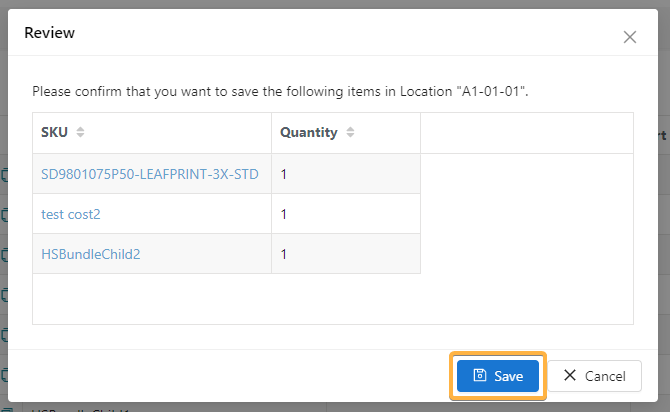
Confirm the information on the screen, then hit Save.
Mark Counted
To mark a location "Counted" and skip manual entry or scanning of items, search for your location then click Mark Counted.
Warning: Make sure a physical count of the inventory in that location has been conducted first!

The Mark Counted pop-up will appear. You can manually adjust the date and time if need be - otherwise, it will default to the current date and time. You can also enter a Count Note and view the Count History of that Location over its lifetime. Click Confirm.
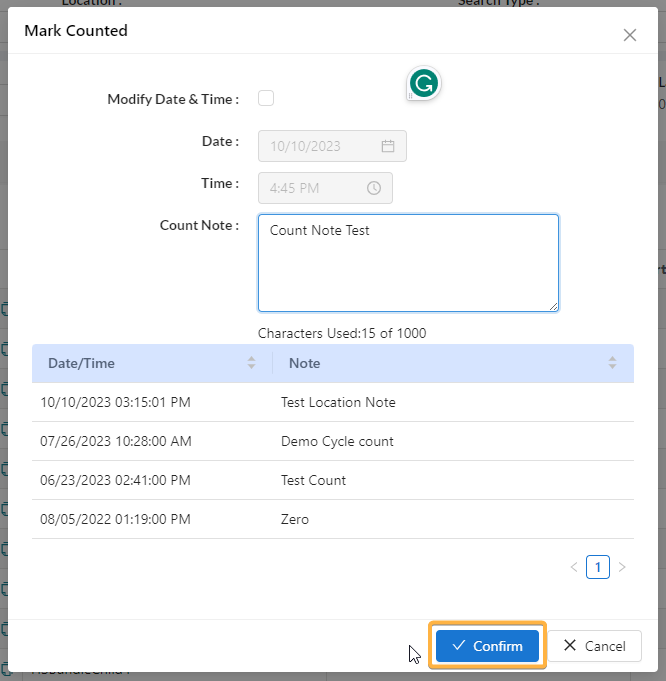
The most recent Count Date and Count Note information will automatically update.

Once you've completed a location count, you can conduct a cycle count.