First, you will need to create a return in ERP or in WMS.
Note: it may take up to three minutes for an RMA created in ERP to appear in WMS.
There are two ways to do this depending on whether you are processing an Invoice Return or a Customer Return.
Invoice Return
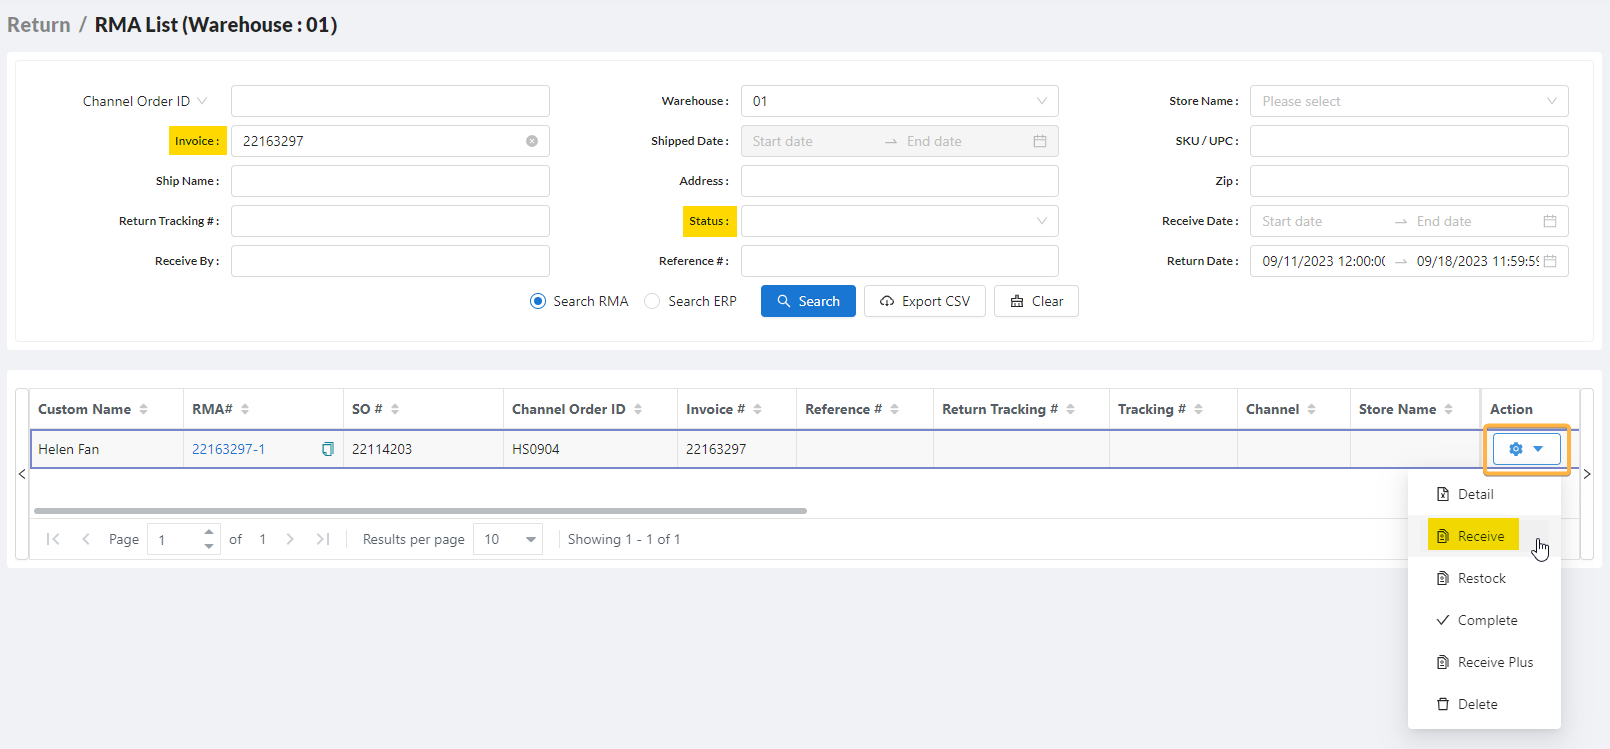
Start in WMS. On the left-hand side, go to Return > RMA List. Enter in the Invoice number (or Channel Order ID, S/O #, etc.), clear the Status field, and click Search. Any returns associated with that invoice will appear below. You can receive items manually by keying in the amounts, or you can scan them in. You will note that both Search RMA and Search ERP are selected by default - this means that the system will search WMS for the RMA first and then, if it can't be found, it will search ERP.

Receive items by manually typing them in
This option is good if you only have one or two items being returned. Locate the return you want to receive, click the gear icon under the Action column, and click Receive.
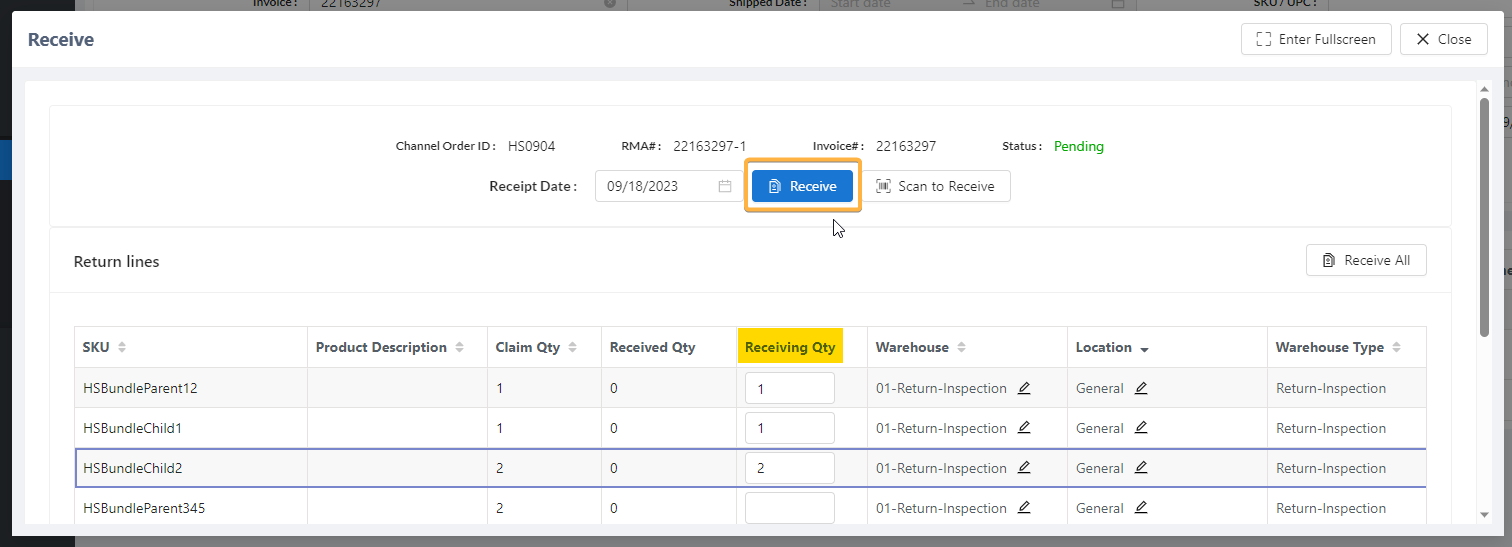
This will open the Receive screen. You can Receive All, or enter the amount being received in the Receiving Qty column. It is also possible to scan the items in from here by clicking Scan to Receive. For this example, let's type in the amounts manually. Click Receive.
A confirmation page will pop up. Click Complete this RMA.

You'll get a little alert that the receive was successful.

You will see this return is now in the status of Processing.

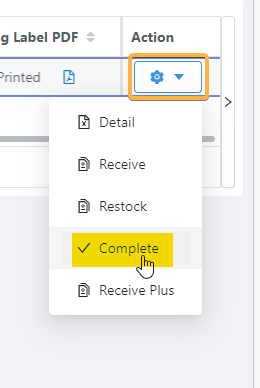
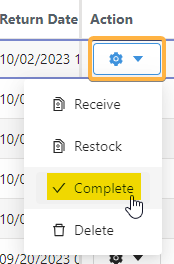
Click on the gear icon again and select Complete. If you have updated your settings to allow Auto-Complete, you can skip this step.
After no more than five minutes, the status will update again to Complete.

Receive items by scanning them in
This option is best for larger orders. Locate the return you want to receive, click the gear icon under the Action column, and click Receive Plus.

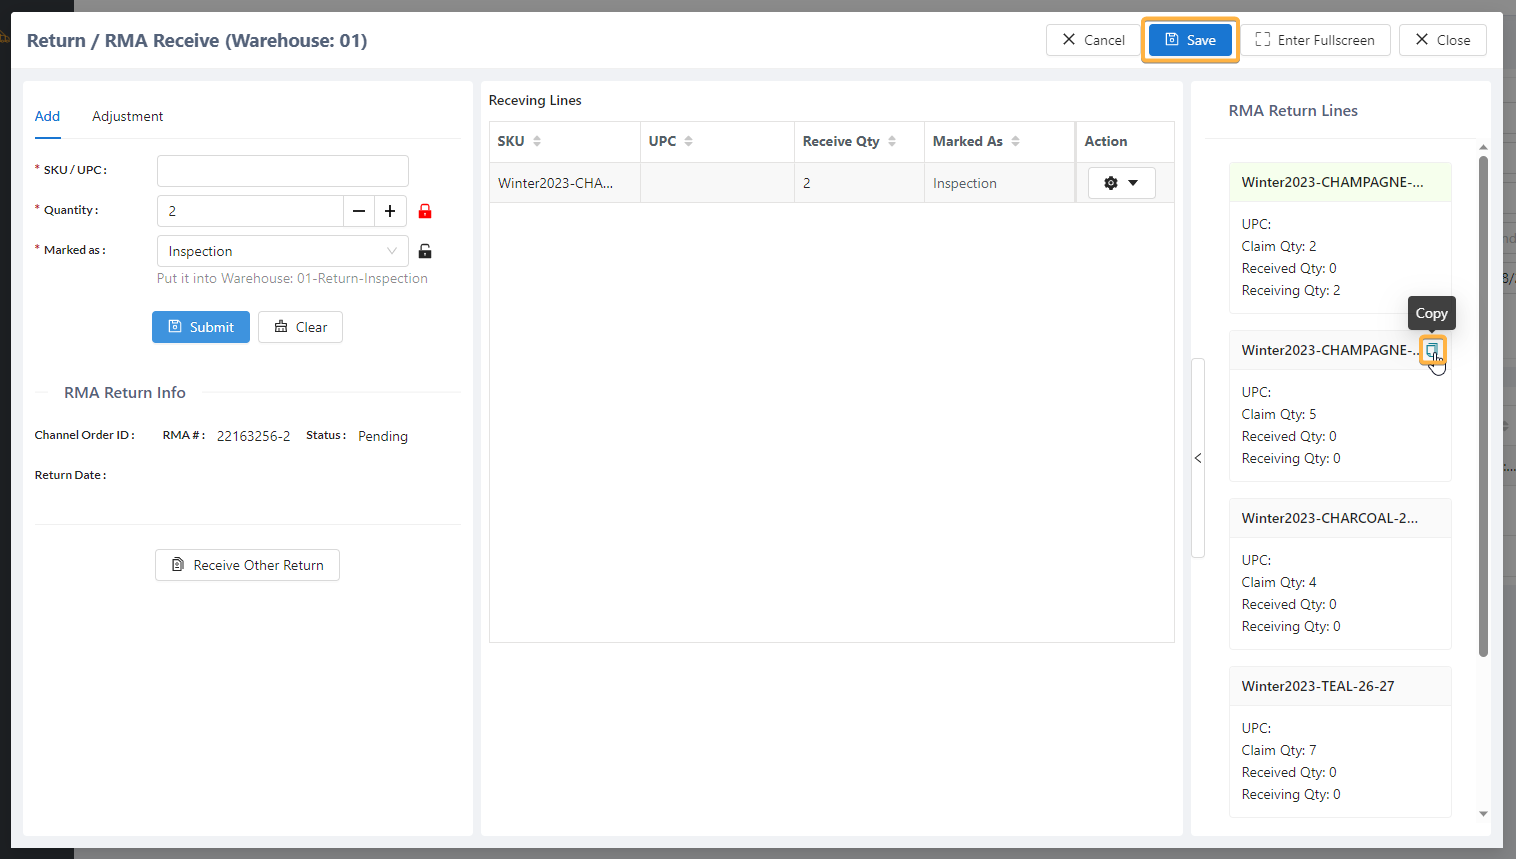
This will open the Return / RMA Receive screen. Next to Marked as, select the virtual warehouse you want the items to go to: Resalable, Damaged, or Inspection. We are going to start with Inspection. Next, you can just start scanning the UPCs of every returned item you have received, or we can do it manually by entering in the SKU and the Quantity and clicking Submit.
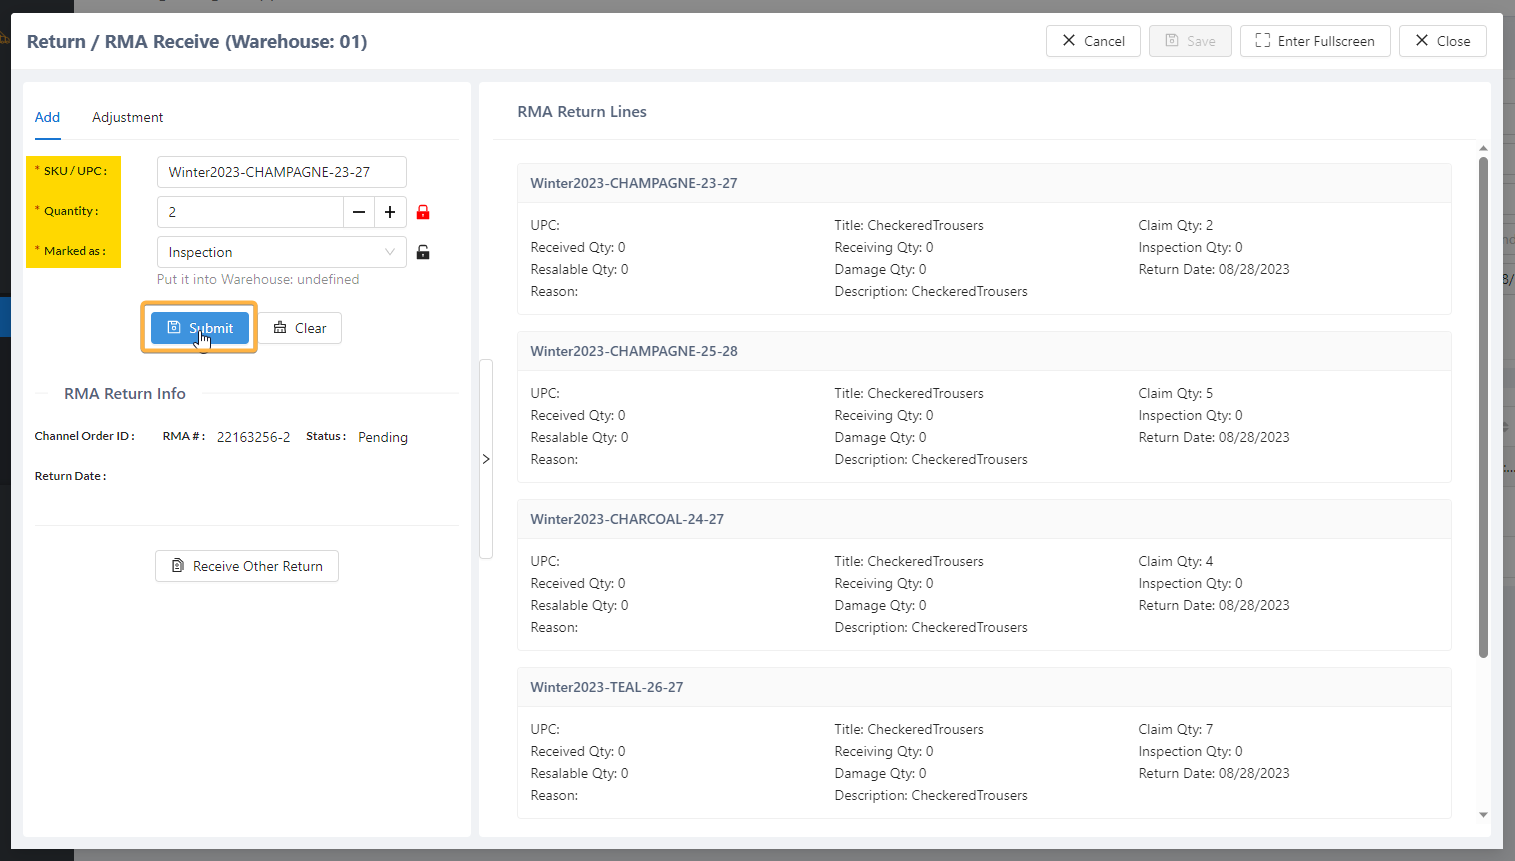
Once the first item has been submitted, it will show up under Receiving Lines and the SKUs in the invoice will be pushed to the right. Hovering over the SKU, you will see the Copy icon. Click that to quickly copy the SKU so you can paste it next to SKU / UPC, update the Quantity, and hit Submit. Whether you are scanning or inputting manually, repeat the steps until you have submitted all the items being returned. Click Save when you are done.
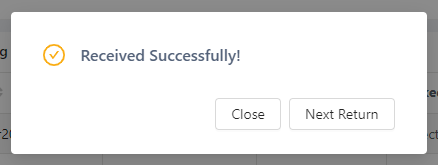
You will get an alert telling you the save was successful.
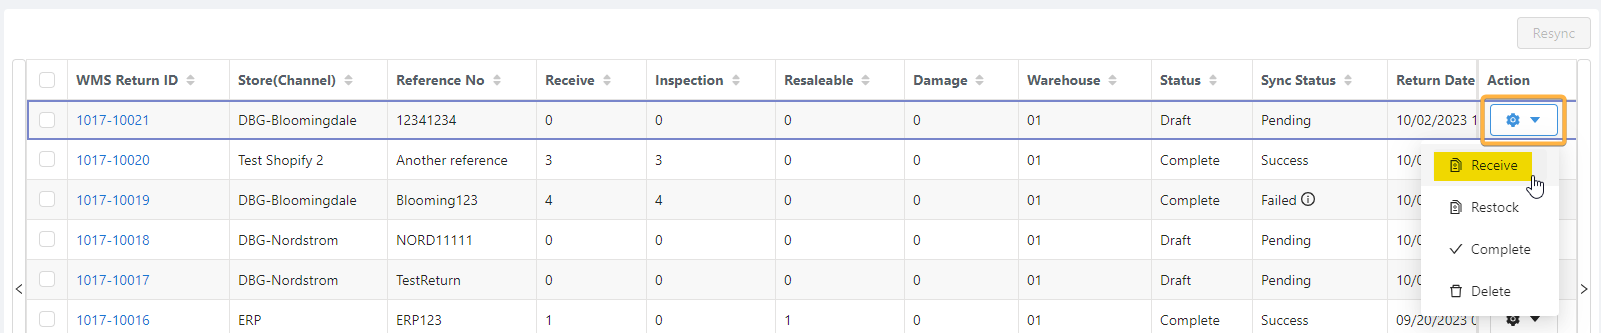
You will see this return is now in the status of Processing.

Click on the gear icon again and select Complete. If you have updated your settings to allow Auto-Complete, you can skip this step.
After no more than five minutes, the status will update again to Complete.

Customer Return
Start in WMS. Go to Return > Bulk Return. It doesn't matter if you are actually receiving a return in bulk or not as the term is used synonymously with Customer Return in this case. Make sure the Warehouse is correct and that the Return Date fields are cleared if need be (there will be default values inputted automatically). Click Search.

Locate your desired return from the list below and click on the gear icon > Receive.
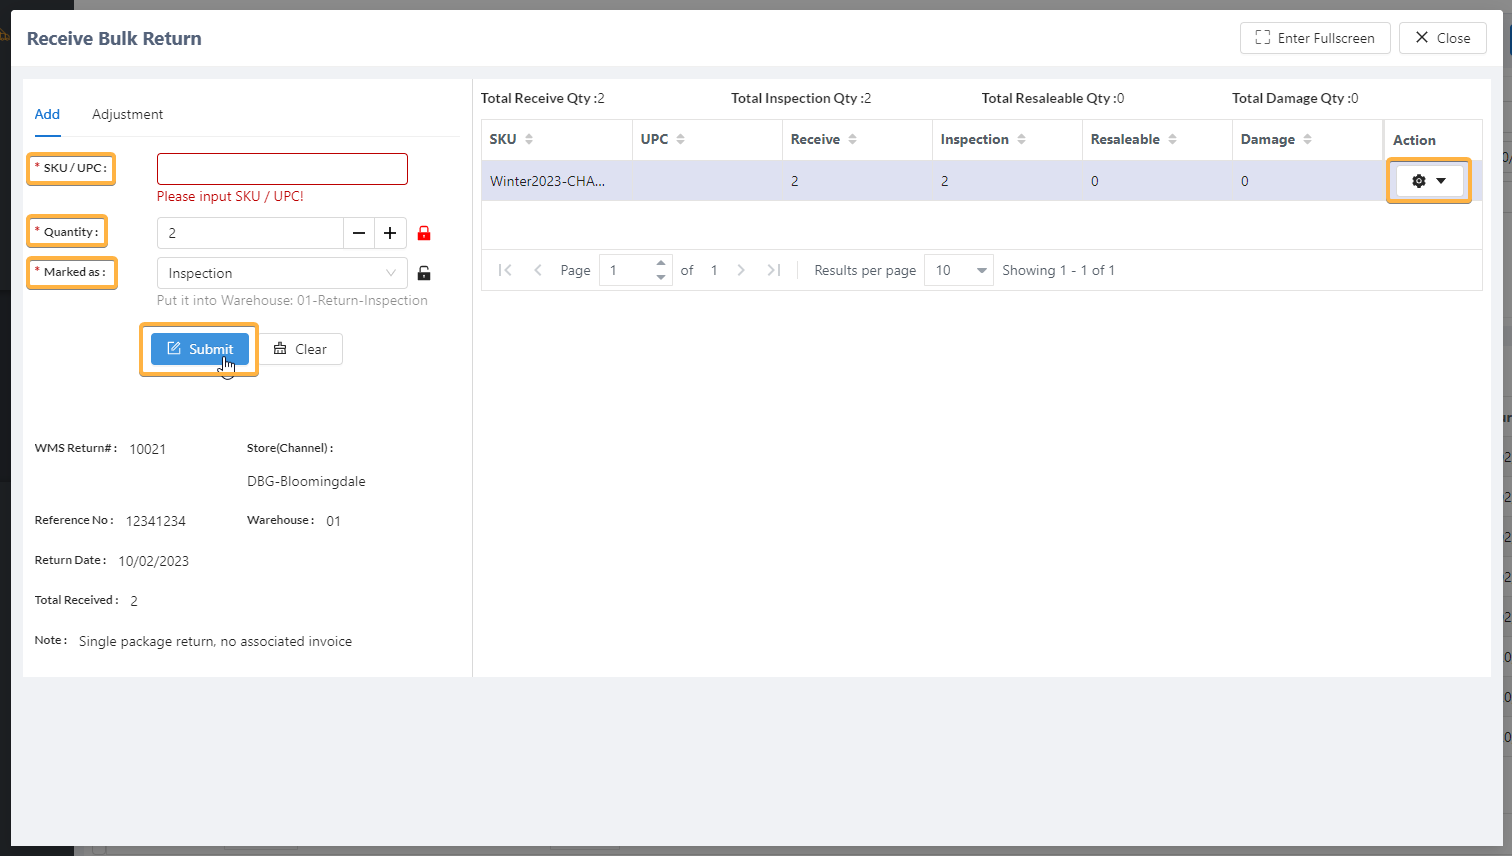
This will open the Receive Bulk Return screen. Here, scan or manually input the SKUs or UPCs for the items being returned. Make sure they are marked appropriately (e.g. are they resalable or being submitted for inspection?). While in this screen, you have the option to make edits to items already scanned in using the gear icon. Once you're done, click Close in the upper right-hand corner.
Now the return will be in the status of Processing.

Click the gear icon again and select Complete.
Click Complete again.

The status will now be Complete.

After a waiting period of no more than five minutes, this return will be searchable in ERP (see Next step below).
Next step: How do I close a return?